
I have had a busy but very fun couple of days. Whilst the girls have been at school I have been getting rather creative and doing a few Halloween crafts!
Last year the girls loved trick or treating. Our neighbours really seem to enjoy it too and most of the houses in our street are decorated, this in turn means the girls come away with quite a few treats. Last year they filled their bags and started using their witches hats to carry more treats. Unable to find any larger treat bags I decided to make them one.
I took a paper bag and hung it on the washing line with a clothes peg. Then using black spray paint I carefully spray painted the bag. As it was hanging on the washing line I could get all the way round the bag to paint all sides, and it dried well blowing in the breeze!
Once dried I drew a ghost and stuck this to the bag to act as a template, Using the glow in the dark paint I sprayed the ghost shape onto the bag. The result is a rather spooky Halloween trick or treat bag [the picture is a bit rubbish but my camera and phone could not pick up on the detail in the dark.



Last year the girls loved trick or treating. Our neighbours really seem to enjoy it too and most of the houses in our street are decorated, this in turn means the girls come away with quite a few treats. Last year they filled their bags and started using their witches hats to carry more treats. Unable to find any larger treat bags I decided to make them one.
I took a paper bag and hung it on the washing line with a clothes peg. Then using black spray paint I carefully spray painted the bag. As it was hanging on the washing line I could get all the way round the bag to paint all sides, and it dried well blowing in the breeze!
Once dried I drew a ghost and stuck this to the bag to act as a template, Using the glow in the dark paint I sprayed the ghost shape onto the bag. The result is a rather spooky Halloween trick or treat bag [the picture is a bit rubbish but my camera and phone could not pick up on the detail in the dark.


My girls seem to really love conker hunting at the minute, and I love that it gives us an excuse to spend more time outdoors. However it does seem to mean that I have a house full of conkers. We do put some of them back outside in our garden for the squirrels.

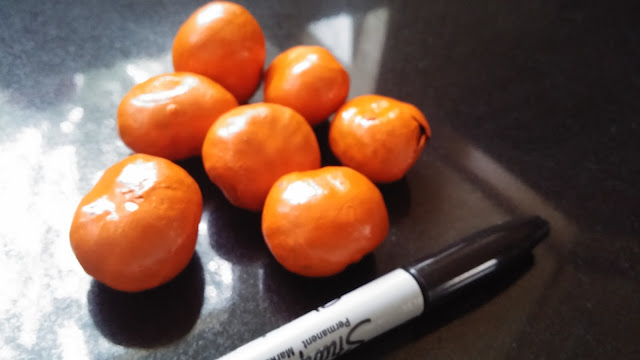
I took some of the very many conkers that the girls have and sprayed them orange.

The great thing about conkers is that they have a similar shape to pumpkins and when sprayed orange look like mini pumpkins. Giving them a lighter spray means some of the conker brown still comes through as if they are stripped, and it gives it a more natural look to a real pumpkin. Of course carving them would be rather tricky so I took my trusty permanent marker pen........

...... and drew some scary pumpkin faces on them!

When the girls came home from school they even drew a few scary faces on the mini pumpkins!
I am thinking of saving a few for Christmas and perhaps painting them white for snowmen?
All paints mentioned were provided free of charge, words are my own opinion.


.jpg "Janome Sewing Machine")

